How to Clarify Butter
One of the best things about eating lobster, crab, or shrimp (and even scallops) is dipping the juicy, succulent meat into butter and savoring the delicious flavor combination. If you're indulging in a fresh seafood meal that includes those shellfish, clarified butter - also known as drawn butter - is a must. Clarified butter is known as a "clean" butter in that certain solids are removed to leave only the pure butterfat. Frying and cooking with clarified butter enables you to cook at a much higher temperature and for a longer period of time, and because the milk solids have been removed, it also has a longer shelf life.
Making your own clarified butter is quite easy. The instructions below are for 1 cup of butter, which produces between 2/3 cup and 3/4 cup of clarified butter. You can double or triple the recipe to make more.
Servings: 2/3 - 3/4 cup of clarified butter
Total time: 15 minutes
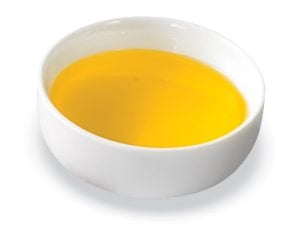 Clarified Butter
Ingredients:
Directions:
1. Place butter into a small, heavy bottomed pan. Turn heat to medium low. Let the butter melt slowly. This will take a few minutes – don't rush it by raising the heat. Low and slow is the way to go. Don't stir the butter as it melts, just let it be.
2. Once the butter is completely melted, you'll notice a foamy white layer has formed on the top. Use a spoon to skim that foam from the surface of the butter, being careful to leave behind the golden butterfat.
3.Skim as much of the foam as possible from the surface. Don't worry if a few specks are left behind, you will strain those away later. If you'd like, you can use the solids you have skimmed in another dish to add flavor – it can be tossed with warm pasta, on rice, or on fresh hot popcorn.
4. Remove the butter from heat and allow it to rest for 5 minutes. Meanwhile, place a wire mesh strainer over a heat-safe bowl. Line the strainer with several layers of cheesecloth. If you don't have cheesecloth on hand, use a coffee filter – it will take longer to strain though, but it's just as effective.
5. Tilt the pan gently, and slowly pour the melted butter through the cheesecloth. You only want to pour the golden fat through the cheesecloth, skimming away the leftover bits of foam.
6. When you get to the bottom of the pan, you'll notice more milk solids. Do not pour those through the cheesecloth – stop when you run out of butterfat and only the solids remain.
7. Pour clarified butter into a container and seal. Store it in the refrigerator. Butter will solidify at cooler temperatures, but can easily be returned to liquid by warming.
8. The taste of clarified butter isn't as rich as regular butter, and it's great for frying foods like breaded eggplant, pancakes or blintzes. The subtle flavor won't overwhelm food unlike frying in animal fats or other types of oil, and it's useful in cooking vegetarian dishes. Clarified butter is also a great choice for people with lactose intolerance.
With that butter made, all you’ll need is some great seafood to eat it with! Lucky for you, that’s where we come in. You can choose between live lobsters or just succulent tails – either way, ours always come with some clarified butter to save you time (though having some backup certainly never hurts!).
Source: toriavey.com